What I Have Learned While Being Diagnosed as an Insulin-Dependent T2 Diabetic

After a 10-year long battle as a Type 2 Diabetic, I was diagnosed as insulin-dependent Type 2 Diabetic (T2D) at the age of 46. This sudden change in my health has had me feeling lost and confused more times than not. What is a carbohydrate? When should I take insulin? How can I help my Type 2 body better use the insulin it produces?  How different is life for a Type 2 diabetic on insulin than a Type 1 diabetic (T1D)?  What resources are available to help me learn to treat this new disease? In this article, I will explore life as a T2 diabetic on insulin and what I have learnt during this journey.

AS A QUALIFIER: The following should be considered as personal experience and observations. However, I am not a medical professional and any information or questions you have should be discussed with your healthcare team. With that in mind, I hope this will be of some use to you. I would also like to extend my thanks to Lilly Canada for sponsoring this education article.

According to research lead by the Public Health Agency of Canada, in 2013–2014, close to 200,000 Canadians were newly diagnosed with diabetes (5.9 per 1,000 population). This represented 0.4 new cases per 1,000 population among children and youth and 7.6 new cases per 1,000 population among adults.  At least I know I am in good company.  When I was diagnosed in 2008, I was one of the 4 per 1000 of the lucky Canadian population in my age group that shared the disease.

What is the difference between Type 1 Diabetes, Type 2 Diabetes and Gestational diabetes?

The government of Canada’s Chronic Disease Surveillance System (i) defines diabetes as a chronic condition that occurs when the body loses its ability to produce or properly use insulin, a hormone that controls sugar levels in the blood. There are three main types of diabetes: type 1, type 2 and gestational diabetes. Other types are uncommon.

What is Type 1 diabetes (T1D)?

Type 1 diabetes is an autoimmune disease. The immune system destroys the insulin-producing cells of the pancreas, leaving the individual dependent on an external source of insulin for life. Type 1 diabetes typically develops in children and youth, but it can also occur in adults.

What is Type 2 diabetes (T2D)? 

Type 2 diabetes is a metabolic disorder. Type 2 diabetes occurs when the pancreas does not produce enough insulin and/or when the body does not properly use the insulin produced. Individuals who are overweight or obese, physically inactive, or of certain ethnic origins, and those who have a family history of diabetes are more likely to develop type 2 diabetes. T2 typically appears in adults older than 40 years, but it can also occur at a younger age, for me I was in my mid-thirties.

What is Gestational diabetes? 

Gestational diabetes occurs in pregnant women if high blood sugar levels develop during pregnancy. Although it usually disappears after the delivery, it increases the risk of developing type 2 diabetes later.

It has been estimated that 90% of diabetes cases among Canadian adults are Type 2, 9% Type 1, and less than 1% of a different type, while the large majority of diabetes cases among children and youth are Type 1. Moreover, gestational diabetes is reported in about 5.5% of births.

The Typical Progression of Type 2 Diabetes

Unlike Type 1, whose bodies suddenly begin destroying insulin-producing cells, Type 2 diabetes, like me, is a progressive disease that can lead to a lifestyle that echo’s Type 1 diabetes and the risks and dangers associated to hypoglycemia and hyperglycemia in addition to the progressive long term risks of diabetes including Eye damage, heart disease and stroke, high blood pressure, kidney disease, mental health issues, and nerve damage and amputation

Dr Vivian A. Fonseca (2), describes the progression of Type 2 diabetes as 5 stages. Dr Fonseca notes that the path to pre-diabetes can begin as early as 12 years before diagnosis, with the progression in a decline in βcell function, and continues throughout the disease process. The primary function of the βcell or Beta Cell is to produce and release insulin and amylin. Both are hormones which reduce blood glucose levels.

Stages of Progression of Type 2 Diabetes

  • Stage 1: Pre-Diabetes Diagnosis
  • Stage 2: Progression from pre-diabetes to overt diabetes.
  • Stage 3: Acute insulin response
  • Stage 4: Progression to medication
  • Stage 5: Loss of glycemic control on medication – Insulin Dependence

The speed and rate of progression are dependent on many influences, however, include High BMI (body mass index), Weight gain, age of progression, High plasma insulin, Decreased insulin response to glucose, Dyslipidemia, Hypertension, Poor β-cell function and choice of treatment.

Type 2 Diabetes: The older we get, the more complicated the treatment. 

What is clear is that Type 2 diabetes is a progressive disease whose treatment requirements increase in complexity, from management with diet and exercise, to medication, and eventually to insulin dependence.  This is even more important when you consider there is typically a positive correlation between age and the progression of Type 2 Diabetes.  The older we get, the more complicated the treatment.

Histogram showing the incidences of diabetes in Canada per 1000 people by age group and gender aged 1 to 85+.
Histogram showing the incidences of diabetes in Canada per 1000 people by age group and gender (i)

While less than 1 in 1000 Canadians under the age of 30 are diagnosed with diabetes each year. This increases to over 10 in a 1000 Canadians by age 55 and over 20 in a 1000 Canadian men, and nearly 15 in a 1000 Canadian women over the age of 70 are diagnosed with diabetes each year. What age-appropriate resources are available to Type 2 diabetics? Where can we learn about how to change our habits and lifestyle to slow the progression of the disease, diet tips, eating tips?  Truth be told, I don’t think I could even tell you what a carbohydrate was when I was first diagnosed.

Here are some of the great diabetes education resources I have used over the years:

Local Diabetes Clinic

Without a doubt, the endocrinologists, diabetes nurses, dietitians, and kinesiologists at my local diabetes clinic rock.  Don’t get me wrong, my endocrinologist gives me a 5-minute lesson on counting carbs and insulin dosing, however, my diabetes nurse is where the real education begins. I highly recommend any diabetic ask for a referral to their local diabetes clinic.

When I was first diagnosed as a Type 2 diabetic the diabetes clinic had a half-day class on what it means to be a diabetic.  I admit, at 36 I was by far the youngest in the class.  However, I walked away with valuable lessons on portion control, low-glycemic foods, and that exercise doesn’t need to be the gym.  They also offered separate classes on bodyweight exercises, cooking and shopping classes and more.

Speak to your family physician, endocrinologist, or nurse practitioner for a referral. You can also check with the clinic to see if they have a self-referral process.

Diabetes Instagram and Facebook Groups

We talk about invisible illness all the time. Looking at a recent trip to the pharmacy, the pile of medications is not as invisible
A recent Instagram Post on Invisible Illness (Diabetes and Crohns Disease)

One of the reasons I write in my blog is to extend the knowledge and experience I have gained as a diabetic. Everyone takes away different experiences when it comes to life, and in my case dealing with diabetes and Crohn’s disease.  If nothing else, it is great to know we are not alone.  Although, we can usually walk away with so much more.  User groups and forums, and more recently Facebook Groups on Diabetes (Diabetes Canada and Type 2 Diet and Support Canada – Type 2 Diabetes) can be great resources to get firsthand information.

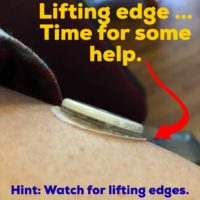
Surprisingly enough – Instagram has been another great resource for both motivation but as well as knowledge.  Much like the posts on my IG Account, many members of the diabetes community post about their lessons, successes, and failures. It is great to know we are not alone. A special shout out to Jessie Inchauspe (GlucoseGoddess), although she isn’t a diabetic her playful use of Continuous Glucose Monitors (CGM) like the Freestyle Libre, give us a great visual reminder of how a normal person body responds to a balanced diet. How close can I get my diabetic body?

Diabetes Websites and Recommended Books

Much like you are doing now, self-help is the last of my resources, although maybe one of the most important.  Self-help equates entirely to ownership, which is the first tool in transitioning our lifestyles to be diabetic friendly.  Don’t get me wrong, I have my cheat days – that’s what keeps me sane.  After all, two chronic diseases can be a bit of an emotional roller coaster at times.

Some of my favourite sources are as follows: 

Type 2 Diabetic Diagnosis and Seniors

As I touched on earlier – I started my diabetes journey in my mid-thirties. I am educated, research and internet savvy, although stubborn, not completely set in my ways, I exercise, although eat out a bit too often.  However, all in all, I had my whitts to be able to help understand what it meant to my lifestyle to be diagnosed as a diabetic. 

Embed from Getty Images

Don’t get me wrong – I hated the diagnosis and constantly tested my life and body without the dependence on medicine to manage my blood sugars.  The reality is, I am a diabetic and in my case, an insulin-dependent Type 2 diabetic.  As my readers also know, I also have Crohn’s disease. 

Much like a Type 1 Diabetic (T1D), I need to test my glucose before each meal to determine how much bolus (fast-acting) insulin I need to take to balance my carbohydrates, and basal insulin at bedtime.  As a Type 2 diabetic, I also benefit from oral medications that boost my body’s ability to naturally manage my glucose.  Even after over 10 years of being a diabetic progressing through the stages of Type 2, I am still learning and more importantly still making mistakes, some of which can have serious and life-threatening consequences like hypoglycemia.

In my defence, it has been a moving target on how to manage my diabetes as I progressed from a Stage 2 Type 2 Diabetic to a to Stage 5 T2 Diabetic (see the stages above).  My newest struggle, what does it mean to be insulin-dependent?  This also has me wondering, If I am struggling as an adult learning how to manage daily life needing to take insulin, how well would senior citizens manage the same progression of their Type 2 Diabetes?  What is even of bigger concern – how well would a senior citizen with progressive cognitive impairments such as Alzheimer’s disease (AD) or Dementia cope with managing sever Type 2 diabetes, or even more importantly their caregivers? 

What resources are available, to learn, educate, and survive our diabetes journies that is age-appropriate? If I can use my parents as examples, I certainly learn much differently than they do in their 70’s.

Lessons I have had the Learn the Hard Way as a Type 2 Diabetic on Insulin

If you read any forum or newsgroup about Type 2 Diabetes, two of the biggest concerns expressed are:

“I don’t like needles, I never want to be on Insulin”, or

“I am very afraid of my sugars going too low”, a situation otherwise known as hypoglycemia. In fact, research shows that 60% of Type 2 Diabetics modify their insulin doses after a hypoglycemic event. Not a good statistic!

Insulin Dosing Mistakes by a Type 2 Diabetic and Hypoglycemia Scares

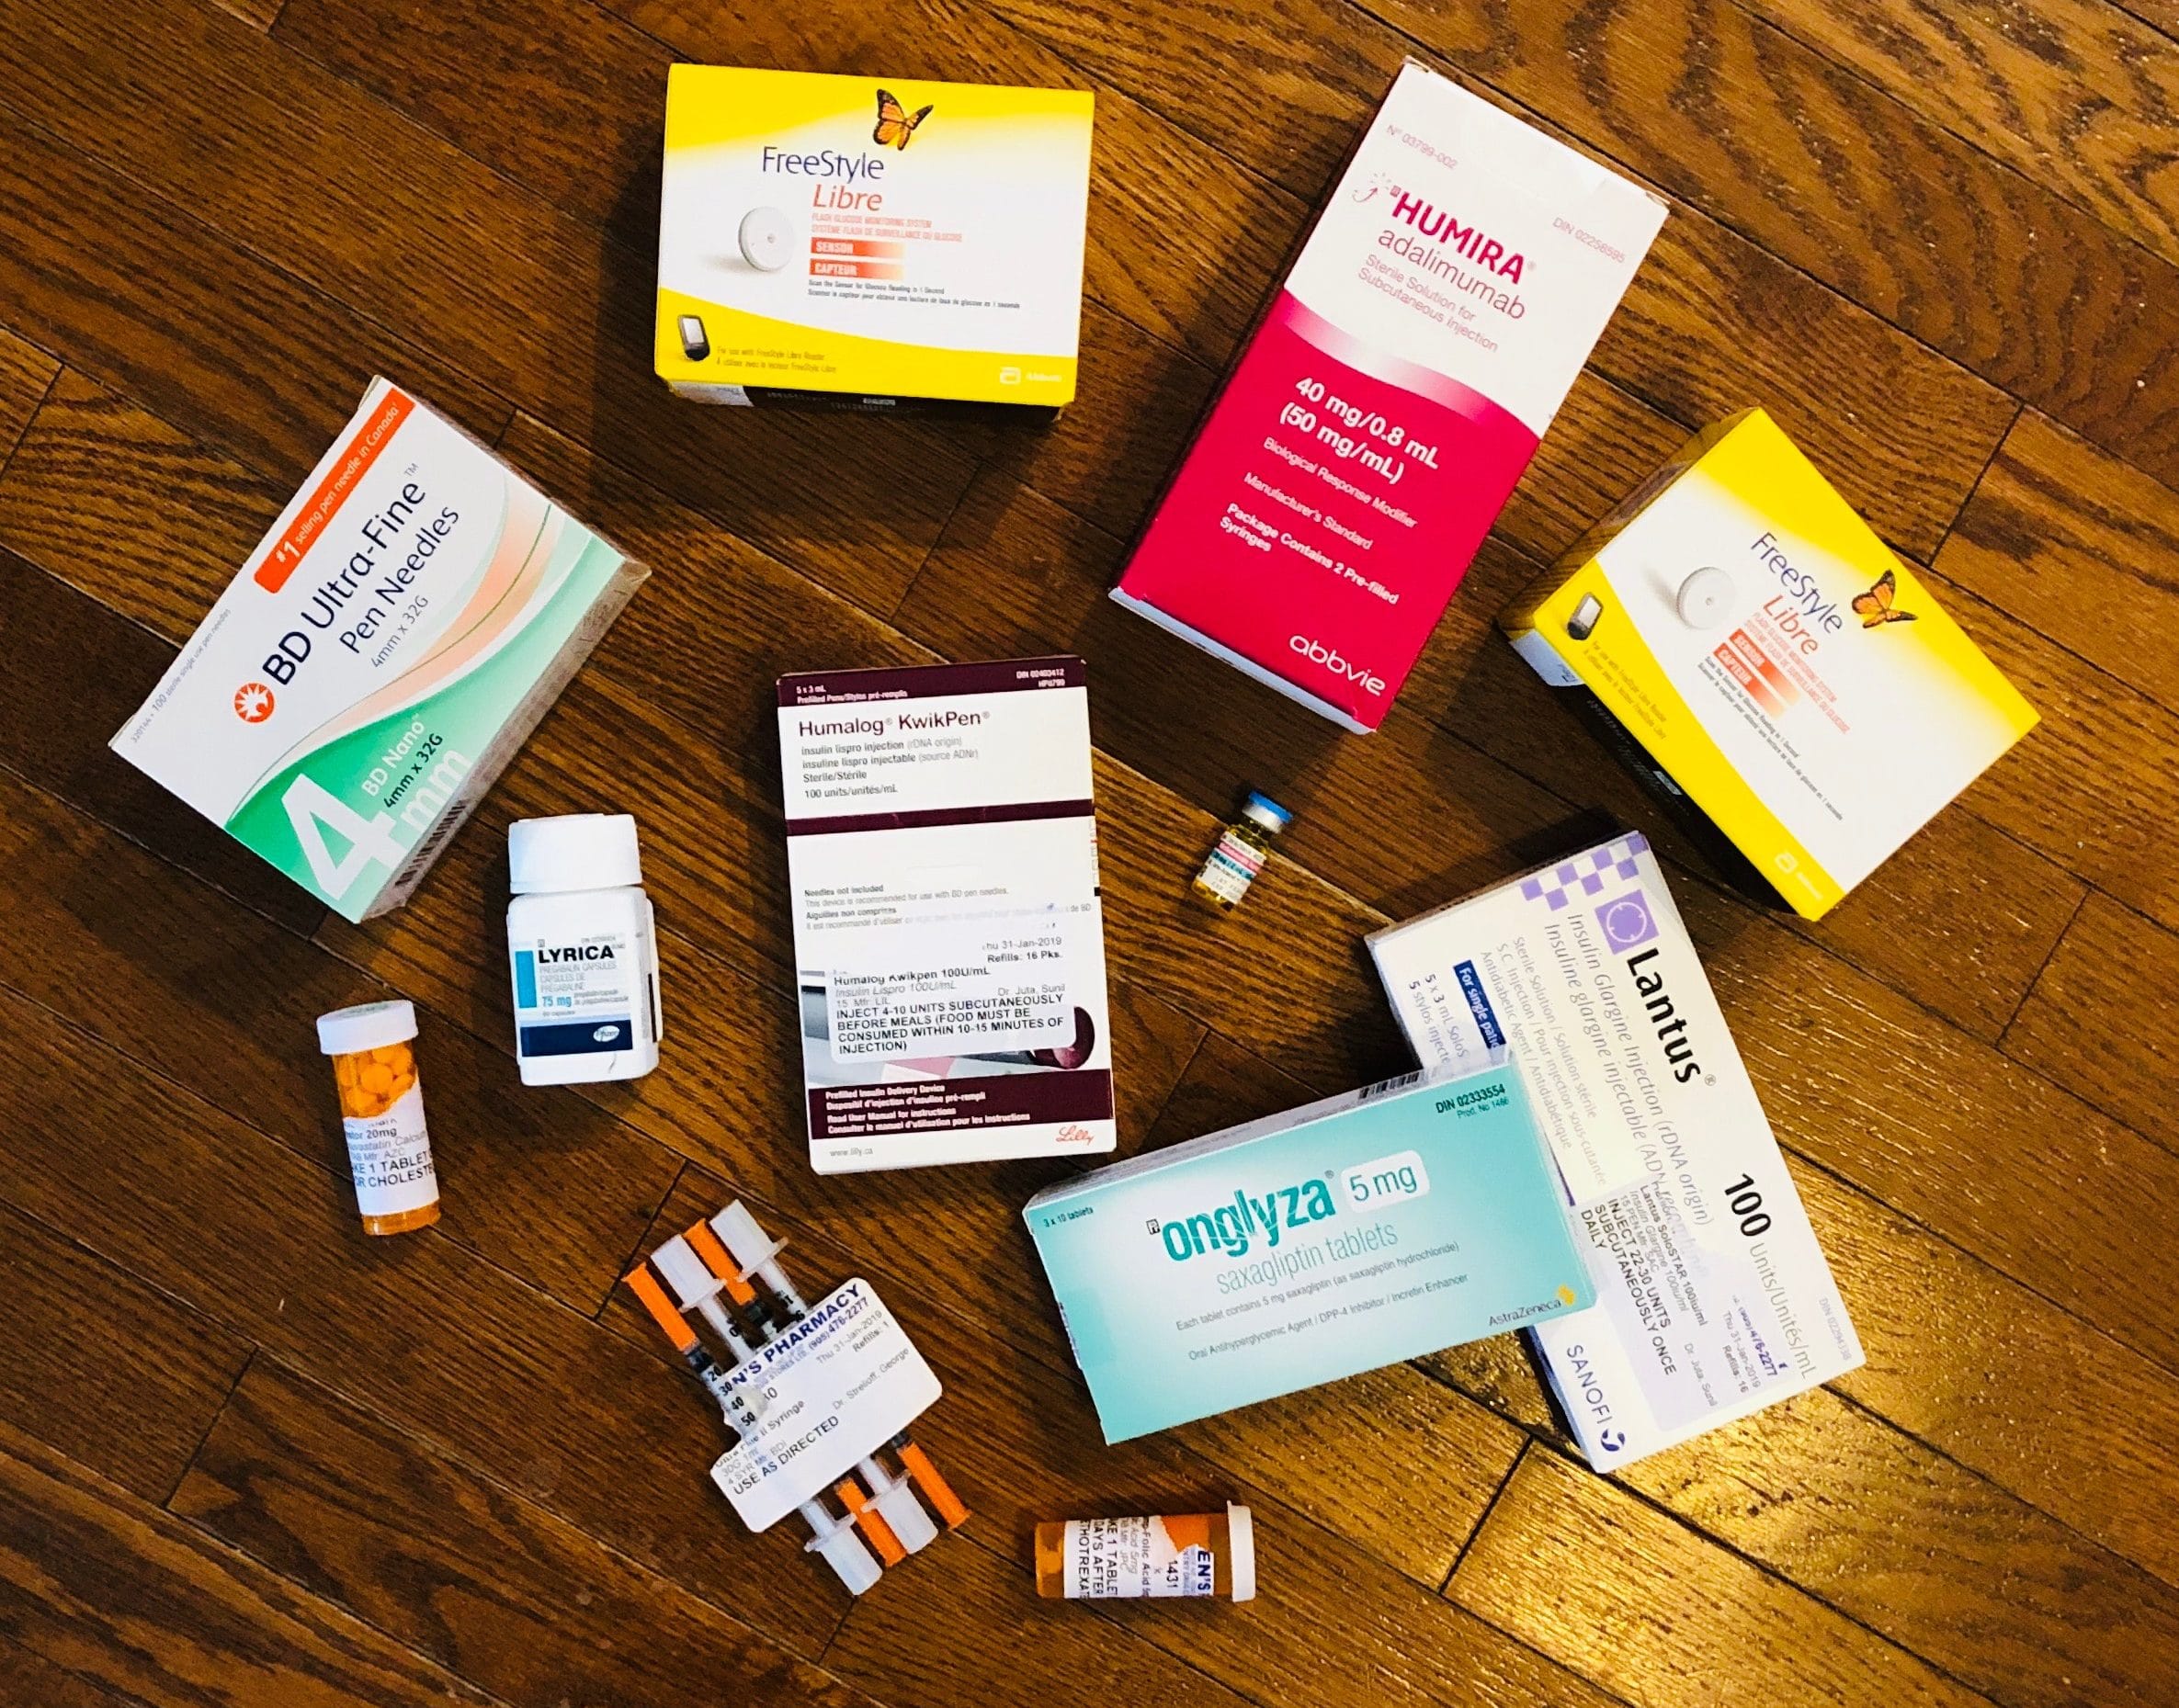
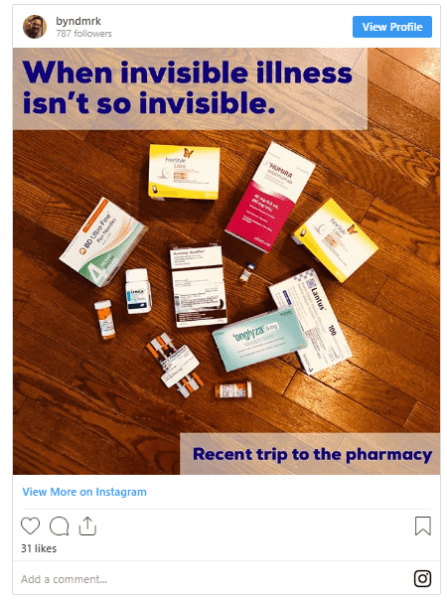
I have made tones of mistakes in my short time living with insulin.  How much insulin should I take, when should I take it, should I take insulin if I have a snack. I was literally given a prescription for Humalog (Fast-Acting Insulin), a sliding scale based on what my pre-meal glucose was, and fingers crossed, sent on my way. 

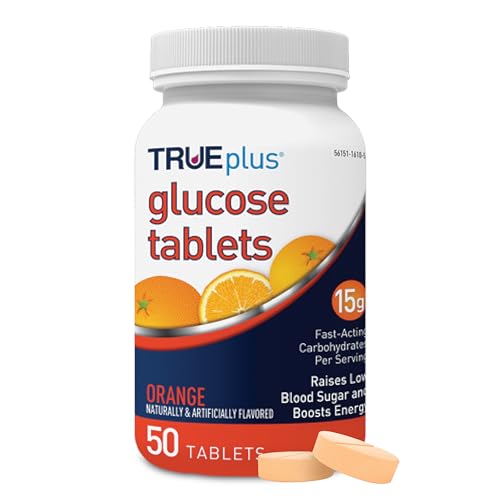
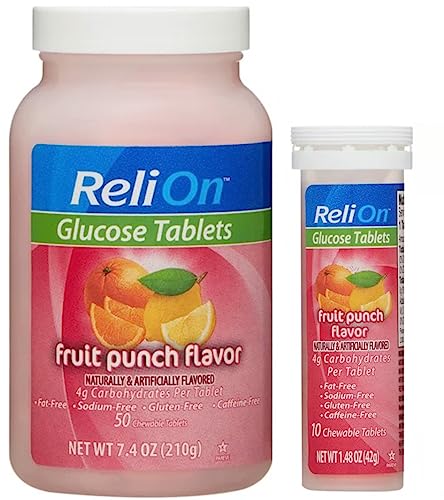
I admit it was overwhelming, scary, and naturally, a bit of a pain to suddenly be dependent on carrying around diabetic supplies: insulin, needles, my glucometer or CGM, and snacks for low sugar events such as Dex4 glucose tablets. I made mistakes!  As much as I have amazing things to say about my diabetes clinic, when it comes to suddenly being thrown into the lifestyle of a T1 Diabetic – I feel that insulin-dependent Type 2 Diabetics seem to bet missed in the shuffle, with resources for parents of recently diagnosed T1D children, and traditional diet and medication dependent T2D.  However, as recently diagnosed T1D adults (or equivalents) – we seem to need to depend on asking our own questions and answers and do not have the right appreciation of the risks.

Severe Hypoglycemia Experiences

What is Hypoglycemia?

Hypoglycemia, also known as low blood sugar, is a condition caused by a very low level of blood sugar (glucose), your body’s main energy source.

Immediate treatment of hypoglycemia is necessary when blood sugar levels are at 70 milligrams per deciliter (mg/dL) or 3.9 millimoles per litre (mmol/L) or below. Treatment involves quick steps to get your blood sugar level back into a normal range either with high-sugar foods or drinks or with medications. Long-term treatment requires identifying and treating the underlying cause of hypoglycemia.

The signs of hypoglycemia - mood swings, dizziness, lack of coordination, difficult thinking, shaking or sweating, loss of consciousness
Signs of Hypoglycemia (Source: Baqsimi Nasal Glucagon)

For Canadians who have diabetes and who are treated with insulin, the fear of going ‘low’ (hypoglycemia) never goes away. When an individual has a severe low (severe hypoglycemia), they are unable to treat themselves, and they need help. For people with Type 1 or Type 2 diabetes who are on medications like insulin, there can be countless causes of severe hypoglycemia. These include not eating enough, over-exercising, drinking alcohol, or even using diabetes medications incorrectly.iii  

There are different levels of low blood sugar: mild, moderate, or severe. If your blood sugar drops low enough that you need help to recover, it is considered to be a low blood sugar emergency or severe hypoglycemia.

My Pre-Bolus (Fact Acting Insulin) Oops

It is recommended that diabetics pre-bolus our fast-acting insulin 10-30 minutes before eating in order to most accurately mimic the insulin response of a non-diabetic.  This will help assist in your blood sugars not spiking before out insulin starts to work. 

What I ended up learning by mistake – pre-bolusing requires a guaranteed eating time and carbohydrate amounts. This past summer (about 6 months into being insulin-dependent) my pre-bolusing at a restaurant created a very scary and escalating problem when our food was delayed due to a technical issue in the kitchen. Within about 30 minutes of my insulin injection and my insulin started to rapidly react to the pre-meal sugars in my body to frightening results – feelings of hunger, severe sweating, shaking, and a mild progression to difficulty thinking. I was experiencing my first moderate Hypoglycemic event.

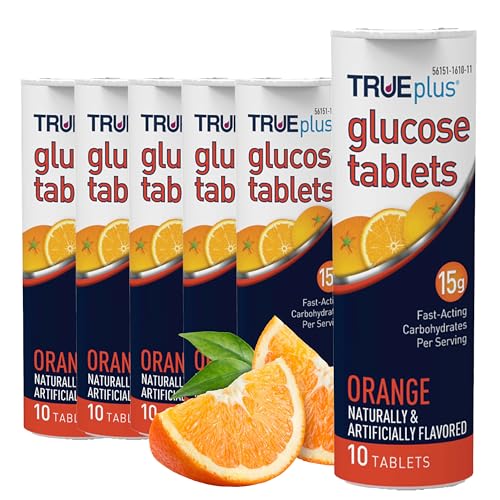
Fortunately, I was able to consume the recommended dose of DEX4 glucose tablets, and a dose of maple syrup from my running bag, however, not before literally sweating through my clothing and spoiling our dinner out. A moderate to severe hypoglycemia event is truly a #daychanger.

Fortunately, I was able to navigate away from a severe hypoglycemic situation where I was may not able to consume glucose to stabilize my body needing 3rd party assistance such as an emergency Glucagon injection, the recently approved Baqsimi Nasal Glucagon, or even worse emergency medical services.

My bigger concern?  What did I do wrong?  How could I be better prepared? No one told me about the risks of pre-bolusing. How serious could the situation have escalated if I didn’t have glucose tablets on hand, and more importantly would my girlfriend have known how to have helped if I had not been able to treat myself? Even if I had known about Glucagon, the standard treatment for Severe Hypoglycemia, would she have known how to mix the syringe, or had the confidence to even try?

As Donald Rumsfeld said “there are also unknown unknowns. There are things we don’t know we don’t know.” The simple risks associated with a life relying on insulin was one of them.

Hypoglycemic Education

Recently I was asked by Lilly Canada to represent the T2D community at an education summit on Severe Hypoglycemia held in Toronto.  It was an honour to share the room with a handful of some of the most influential diabetics from across Canada, and Lilly spokesperson Crystal Bowersox, a strong T1D and advocate for diabetes education and awareness. 

Attendees of the Lilly Canada Severe Hypoglycemia Summit 2020, Toronto, Ontario
Amazon diabetics and Lilly Staff from across Canada that attended the Lilly Canada Severe Hypoglycemia Summit 2020, Toronto, Ontario

The day with Lilly Canada covered education on hypoglycemia, existing treatment options for moderate and severe hypoglycemia, discussions and panel presentations with some very inspirational T1 Diabetics, information by medical professionals and medical officers from Eli Lilly, and the day ending with an amazing demonstration and discussion with the founders of a recently Health Canada approved treatment of Severe Hypoglycemia called Baqsimi.

Baqsimi: is a new rescue treatment for severe hypoglycemia, demonstrating Lilly’s commitment to simplifying diabetes management through medicines and patient solutions. The formulation was discovered in Canada and is changing the lives of people with diabetes around the world. Baqsimi™ (glucagon nasal powder 3 mg) was approved by Health Canada (Approved January 2020) with ethical status, making it available at the pharmacy with or without a prescription. Baqsimi is indicated for the treatment of severe hypoglycemic reactions when impaired consciousness precludes oral carbohydrates, which may occur in the management of insulin-treated patients with diabetes mellitus, whether Type 1 or Type 2.i Baqsimi is a compact nasal spray that is portable and does not require reconstitution. It is now widely available in pharmacies across Canada.

Lilly Canada, Ready for Rescue – New Nasally Administered Glucagon for Severe Hypoglycemia Available in Canada

What I see as the Benefits of Baqsimi

Baqsimi is a nasal version of Glucagon. Simple, no injection safety for sever hypoglycemia
Baqsimi Nasal Glucagon – Non-injection of glucagon for severe hypoglycemia

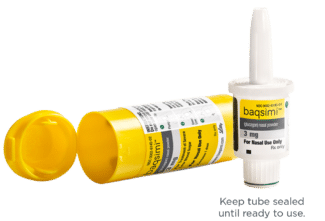
I was amazed by the simplicity of Baqsimi – where traditional Glucagon emergency kit requires the medication to be mixed with a saline solution, then drawn into needle and then injected (See complete instructions here); Baqsimi is a simple nasally administered Glucagon. Anyone, no matter of age, medical experiences, or panic level, should be able to assist their diabetic loved one or stranger through a severe hypoglycemic incident. This is even better for coaches, schools, and all of our diabetes emergency kits.

Learning the Diabetes Ropes from T1D Community

I was honoured to have been able to consult at the Lilly Severe Hypoglycemia Summit, and the topic of hypoglycemia was as engaging as it was informative. More than anything else, and what instantly jumped out at me surrounded by this powerhouse of diabetics; who had travelled from as far as British Columbia and Montreal to attend; is that even as adults living with Type 1 diabetes, individuals who have had decades of experience managing their diabetes (ts all they have known, its a way of life) – yet, even with decades of being insulin-dependent, even diabetic experts make mistakes and need to treat for hypoglycemic events and in some cases have needed medical assistance due to a severe hypoglycemic event.

As a new T1 “like”, T1.5, insulin-dependent T2 diabetic, I have a lot to learn about managing my diabetes, managing my glucose, improving my A1C, and managing both my glucose highs (hyperglycemia) and my glucose lows (hypoglycemia). I hope I will never have to use Baqsimi to treat a severe hypoglycemic event – however, now have the knowledge on how to teach my friends, colleagues, and loved ones, including my 10-year-old, what to do.

As I mentioned a few times over this post – Type 2 diabetes (T2D) education is a challenge and from my perspective still has many holes. However, as a community, we will continue to provide resources and opinions and hopefully give our peers a place to start their own diabetes education journey.


i  Diabetes in Canada, Highlights from the Canadian Chronic Disease Surveillance System (11-14-2017). https://www.canada.ca/en/public-health/services/publications/diseases-conditions/diabetes-canada-highlights-chronic-disease-surveillance-system.html

ii  Defining and Characterizing the Progression of Type 2 Diabetes. Vivian A. Fonseca, MD (vfonseca@tulane.edu) Diabetes Care 2009 Nov; 32(suppl 2): S151-S156.https://doi.org/10.2337/dc09-S301

iii Diabetes Canada – Severe Hypoglycemia – Last accessed on January 17 – ttps://www.diabetes.ca/health-care-providers/clinical-practice-guidelines/chapter-14#panel-tab_FullText

Canadian Politics: A Coalition Government and its Strengths for Minority Government

Much like the 2006 and 2008 elections, Canadians have spoken loud and clear this past October 2019 with the election of a minority Liberal Government.  It is not that we are indecisive, it is not that we are confused, or simply do not care about the future of the country.  It is simply that we want a political system that is accountable, that reaches every Canadian – an opportunity for real, genuine, and healthy governing for the country.

When it comes to politics in general, I admit I am the furthest from an expert as anyone can be. To be brutally honest, within the first weeks of University I ran away from my declared “Poli-sci” major with my tail between my legs and switched to something far less philosophical and much more interesting, the environment.  Nonetheless, sitting from the sidelines as a person in sound body and mind; well sort of, it is questionable about the sound body (Crohn’s disease, diabetes); you begin to wonder “to what degree our Canadian political representatives have a clue?”  This was a post I originally wrote in 2009 after the Harper Government won its second minority government in a four year period – however, holds very much as true today, with a bit of an update.

Between 2000 and 2011, Canadians have visited the polls on five occasions – three of which were 2004, 2006 and 2008, and twice since then. In a political system that structures federal elections every four years, having six visits to the polls over the same time period seems dumbfounded.  What is characteristically more interesting was the repeat result of the 2006 and 2008 elections, a minority, Conservative, government.  This does not speak specifically to the governing party, as the same could be said to be true for any party, but does question the need and purpose of going to the polls.  This is even more profound as in a perpetual sphere of a looming no-confidence vote, and yet a fourth federal election. 

What is a Minority Government?

Wikipedia defines a Minority Government as an “a cabinet of a parliamentary system formed when the governing political party or coalition of parties does not have a majority of overall seats in the parliament”.  Wikipedia continues to define a minority government as less stable and less arrogant as it (often) requires a “compromise between the different parties to ensure the passage of legislation“.  I would argue that the later may be the most, yet comical descriptor of the current breed of Canadian Politician, but decidedly the single most critical aspect of a minority government.  More importantly, I believe that critically, this is where, as Canadians, we are failing time and time again. 

Is it naive to think that the goal of Canadian politics, and politician as a whole, can simply be more than a battle of whose belt buckle is the largest, is it naive to think that as “professionals”, our political representatives actually want to play a critical part in helping the country prosper and not simply participants in an adult game of king of the castle at the measly price of about $450 million dollars around?

Varying Political Opinions, one goal

Much like the 2006 and 2008 elections, Canadians have spoken loud and clear this past October with the election of a minority Liberal Government.  It is not that we are indecisive, it is not that we are confused, or simply do not care about the future of the country.  It is simply that we want a political system that is accountable, that reaches every Canadian.  Unfortunately, Ottawa appears too blinded in its own fight to become “the King” to realize the strength in our representation in the house.  With our current 338 member caucus made up between the four primary parties (Le Bloc Québécois, Conservative Party of Canada, Liberal Party of Canada, and New Democratic Pary of Canada), the Green Party and one independent you will always have fundamentally different opinions on how to govern the Country. 

Source: https://thecanadianpress-a.akamaihd.net/graphics/2019/federal-election/election-night/english/map/index.html

Similarly, even within a party, governing or not, there are fundamentally differing opinions on how to govern north vs. south, east coast vs. west, urban vs. rural.  It is ignorant to presume that one governing model fits all Canadians, and the election of a minority government is a true indication of such, and in turns its strength.  A minority government does not represent a weak government, but an opportunity for a united Canada where a balanced agenda can be achieved, a government that offers opportunity for all voices to be heard, and all parties working together for change, and most importantly it is a government where the politicians will be held accountable to the people and to themselves.

An Opportunity for Political Change in Canadian Politics

The sign of a true leader is not how well the lemmings follow in perfect formation, “Yes Men”, but how well they manage and communicate change.  A minority government provides an opportunity for sanctioned ‘negative thinking” or “devils advocacy”.  Carol Kinsey Goman notes in her article, “The Power of Negative Thinking“, that organizations should build constructive conflict into your decision-making processes by developing organizations with a diversity of thinking styles, skill levels, and backgrounds. Kinsey-Goman continues by acknowledging that “the most successful organizations will be those who can harness the power of creative collaboration without falling victim to “group think.” Perfecting this delicate balancing act is going to take leaders who understand how to foster constructive conflict”.

Fostering a New Future for Canada Politics

On January 20, 2009, the Bank of Canada announced that we, much like the rest of the world, are in a recession.  Retirement portfolios have declined sharply, and business and citizens are concerned over their finical well being, and in turn that of the Countries.  The 2008 minority Government steered the country through this economic hiccup.  Its time to continue that time of cooperation among all parties, now is the time positive change.   The answer is not with who’s flag is flying high at 24 Sussex Drive, but how well that leader can build upon the ideas and vision, of all parties, and in turn the country.


Note: Originally published, January 21, 2009. Republished, October 26, 2019

The Importance of Hydration in Endurance Running and Cycling

As endurance athletes, we are well acquainted with our electrolytes and carbohydrate gels. However, did you know that all workout hydration plans are not created equal? Depending on the duration and intensity of your workout, your body has different needs in terms of hydration and fuel. This article talks about the importance of Hydration in Endurance Running and Cycling.

Staying properly hydrated is a foundational pillar for your workout performance, but are all workout hydration plans created equal? The answer is: No, depending on the duration and intensity of your workout, your body has different needs in terms of hydration and fuel. For endurance athletes, that long-distance hydration threshold occurs around 90 minutes of sustained sweat.

The great makers of Nuun have provided this excellent article on “Hydration for Long Distance sport”. Nuun is a company dedicated to keeping you as hydrated as humanly possible. Their drink tablets are fizzy, tasty and loaded with electrolytes that keep you healthy and hydrated!

During long-distance or high-intensity exercise, our bodies utilize stored carbohydrates as a primary energy source. To put it simply, our bodies are only able to “bank” a certain amount of carbohydrates before we need to begin to feed it more. The oxidation, or utilization, of our internal carbohydrates storage (glucose), burns steady for the first 90-minutes of sustained exercise. Once we reach that threshold, we need to begin to replenish our glycogen stores in order to prevent a drastic hit to blood sugar levels and the function of our organs.

After 90-minutes of exercise, our physiological needs begin to shift. The sustained stress on our systems requires different nutrients and ratios of those nutrients in order to push fluids into circulation most efficiently. Carbohydrates become a key component of the role of fluid circulation. Due to the body’s need for sugar replenishment, carbohydrates are more easily processed. When combined with fluids and electrolytes, carbohydrates bind to electrolytes and aid in facilitating absorption into the bloodstream.

Continue reading at NuunLife.com

What Training for the Under Armour Eastside 10K Reminded me About Myself

I wish I could say the road to the Under Armour Eastside 10K was an easy race – so what better reason than to write about my running journey through injury and chronic illness (diabetes and Crohn’s Disease) and its impact on my training for this Vancouver 10K road race.

As a recreational runner, it was a humbling honour to speak to Canadian Running Magazine’s ShakeOut Podcast host Kate Van Buskirk, about my running journey, a place usually reserved for elite runners. In addition to being the host of the ShakeOut, Kate is an incredible internationally accomplished track athlete.

Before the interview, I gave the subject ”What I was reminded about myself training for the Under Armour Eastside 10K”, a bit of thought and wanted to share, my journey as a runner as well as the journey preparing to run the Under Armour Eastside 10K in Vancouver, B.C.

Check out the Canadian Running Magazine ShakeOut Podcast. LISTEN HERE

My Running Journey

We all have our own motivations to start picking up any sport or a hobby for that matter, are we looking for community, exercise, personal growth, a distraction from what is going on in life at the time. For me, I suppose it was all of the above – however, if I had to pick just one it would need to be personal growth.

Chronic disease and injuries seem to have been the shadow, for lack of a better label, that has followed me for a number of years. I have Crohn’s disease (diagnosed in 2005), an inflammatory disease of the bowels, and insulin-dependent Type 2 diabetes (diagnosed in 2010 and progressing to full insulin dependence in 2018). To top of this wonderful trifecta, I also suffered a significant leg injury in late 2008 resulting in a radial fracture of my tibia and fibula that had me on crutches for 4 months and using a cane for over two years. Give this old blog post a read to hear more about health adventures (Drawing a Short Straw in Life).

CROHNS DISEASE

My Crohns disease presents itself as a rheumatic response which affects the major joints in my body as well as poor or no control of my bowels. Imagine an illness that gives you lifelong runner’s trots.

DIABETES

 Fulling myself through any exercise routine is a balance between effort and glucose control.  I know my body doesn’t do well with high-intensity circuit training.

The combination of these had me in and out of the hospital on several occasions and very much defined who I was, and how people saw me. I was that guy that was sick, bumped, bruised, and fragile.  It took a toll on my career and my relationships.

Me laying on my back - something is up with my right leg (left side of the picture).
Opps – I think I slipped – Radial fracture (right leg).

IMG: My monthly does of medication for Crohns and Diabetes. 12 items in the picture.
Invisible Illness? Humm….

IMG: Under Armour East Side 10K - 2019.  Picture of the runners coral.
How can I let that stop me?

To put my illnesses into perspective, for the month of July 2019 – I spent a total of $2,872.03 on medications and related supplies.

I know many people in my situation that use chronic disease as an excuse; I can’t exercise, I can’t go to work, I can’t leave the house, and even those without the burden of chronic illness following similar arguments of I am too out of shape to exercise, I am not in the mood to exercise, I am too depressed, I am too busy.

To be fair, I have felt the same way. I also realize that life has ups and downs and we need to make the most of every situation. What is the notable saying by Ralph Waldo Emerson, “It’s the not the Destination, It’s the journey.”

“My illnesses are chronic, life long, are a part of me but do not define who I am – running is one way I remind myself of that, one way that I push my own limits and achieve a new personal best.”

It doesn’t matter what life throws at us, injury, divorce, illness, depression (I can relate to all of the above), we learn, we grow, we adapt, and more importantly, we bounce back. I could not let these disabilities define me or more importantly how my boys, now 13 and 10 see me and or how I and in turn, they, should deal with adversity. My illnesses are chronic, life long, are a part of me but do not dictate who I am – running is one way I remind myself of that, one way that I push my own limits and achieve a new personal best. Not just in time, but in new plateaus – whether that is a new distance milestone, recovering from injury, or simply achieving my training plan for the week.

For my interview with Kate, I scrolled through my Under Armour MapMyRun app to track down my first run – yes, even on day one I pulled out the tech. Hey, that’s me! Like many firsts, I still remember the run as if it was yesterday. I officially started running on March 24, 2015 – a 3.14KM run at a 7:16 pace that truthfully kicked my butt. I recall having trouble making it to the next street, never mind the next block or two – however, I pushed onward.

Img: Contour lines of Pace and elevation of my first ever road run.  pace too fast, cardio was in the dumps, and no structured run-walk mix.
First run ever: Humm — pace too fast, cardio was in the dumps, and no structured run-walk mix

That first run was the start of a running journey that has helped transform me both mentally, emotionally, and physically, and has kept me moving, running, and pushing myself and my body, and what I hope is a great example for my boys. If I look back at Mark before running and Mark today – it would be difficult to see the physical transformation. However, mentally, it is hard to believe I am the same person who was a mute wallflower, is now confident, personable, active, and strong – mentally, physically, and emotionally.

Image: My First Road Race: Pink 5K (2015) - Sorry, no boa. With my Dad who surprised me and came to cheer me on.
My First Road Race: Pink 5K (2015) – Sorry, no boa. With my Dad who surprised me and came to cheer me on.

I ran my first 5K race two months later at local Pink 5K Cancer Run. My sister, an accomplished half marathoner, who also ran with me last weekend in Vancouver, made me wear a pink running shirt that in addition to being a women’s athletic fit was also a few sizes too small that made for some awkward pictures; If I recall, there were even pink boa’s involved.

I have run various 5K, 8K, 10K races, and the Scotiabank Toronto Waterfront 1/2 Marathon, as well as a handful of 5-Peaks trail races, and most recently had the exciting pleasure to run the Under Armour EastSide 10K in Vancouver on September 14th. I have to give Canada Running Series (CRS) some kudos, they continuously put on well-organized and managed running events – CRS and CRS West that hosted the Eastside 10K are an incredible asset to the running community.

The Road to the Under Armour EastSide 10K

I was fortunate enough to win the Canadian Running Magazine and Under Armour contest to travel the 3500 KM from Toronto to Vancouver to run in the Under Armour Eastside 10K on September 14, 2019. This was the perfect motivation to refocus my spring running, let’s aim for a 10K PB (my current personal best in a 10K is 54:11, as I don’t consider a downhill 53:44 as a fair indicator) and aim for a Half Marathon in October (PB of 2:00:57) were my two goals moments after I received that incredible email that I had won the contest.

Lofty goals I know – however, achievable right? With the contest win, I also had the tools to make this reality. A brand new training plan with a fresh perspective to running and one-on-one virtual training coach by the name of Rich Hesketh. Rich is a training development coach based in Calgary, Alberta and an Under Armour Training Team member and Brand Ambassador. Rich has worked with numerous elites.

The post is continued on the next page.

Tip: How to Stop Your FreeStyle Libre Sensor From Falling Off Before the 14-day Expiry?

Here are 8 tips I have been using to help stop my Libre Glucose Sensor from falling or being knocked off of the back of your arm since 2018.

DISCLAIMER: I have included links to my Amazon Store where you can purchase many of the items suggested. Looking for accessories for your FreeStyle Libre – look here.

Tip 1: Hair is our enemy, start with a blank slate and shave any hairs

Hair gets in-between the skin & sensor adhesive. This is where your wives or girlfriends can get a bit of pleasure and help remove the hair from a small area on your arm to ensure the Libre or Freestyle Libre 2 Sensor has skin-to-skin contact.

Good clean, dry, skin to skin contact is critical. Bring out the hot wax! LOL, however, a razer works just as well.

Tip 2: Ensure the Libre sensor area is clean and dry

The FreeStyle Libre, Libre 14-day, and Libre 2 work best when the skin is clean, dry, and oil and sweat-free by using the two supplied alcohol wipes. This includes removing any residue left over from your last Libre Sensor. The Lady btw sensor comes with two alcohol cleaning pads. Clean in a circular motion moving from the centre of your Libre area outwards. Be sure to use both alcohol pads and let the area dry completely before proceeding.

If you use Skin-Tac or similar products, you can also try  – this unique formula effectively removes even the most stubborn adhesive residue leaving the skin clean, dry, and without a greasy film.

Tip 3: Pre-treat the Libre Sensor area with Skin Tac or similar

If you are finding that your Libre or Libre 2 sensor is not sticking well or causing some skin irritation pre-treat the skin with Skin Tac Adhesive Barrier Wipes  barrier prep wipes to improve the adhesion of the Libre sensor to your arm.

Skin Tac Adhesive Barrier Prep Wipes has two main uses:

  • They provide a tacky surface for you to easily fix any dressings or tapes to (or our Libre), and
  • They provide an effective barrier between your skin and those dressings that may be causing irritation.

Tip 4: Smooth the edges around yours Libre with a Blunt Object

After you have applied your FreeStyle Libre, press around the edges of the Libre adhesive with a blunt object such as the end of a spoon. This will help reduce the chances of an edge starting to lift.

I also keep the applicator for the two weeks. This fits nicely around the Libre and can be used to help push down the edges of the adhesive ever few days.

Special thanks to Nerdabetic for this great tip.

Tip 5: Wait one hour before getting you Libre Sensor wet

To give the adhesive the best chance of success – try to wait at least one hour after applying a new sensor before you get it wet. Getting the sensors wet could be as simple as having a shower or going for a swim.

This also includes exercise — let’s keep sweat away from our sensors for at least an hour. Similarly, I do not put on my sensor immediately after my shower. I give my skin a half hour to an hour to dry before I put on a new sensor.

Tip 6: Pay attention to lifting edges of your Libre adhesive

Watch the edges around your FreeStyle Libre for loose adhesive. Add kinesiology tape or a patch to help it last the remainder of your 14 days.

You may notice that although your Libre or Libre 2 is securely attached, there may be some minor lifting around the edges of your Libre Sensor. These little edge lifts are usually the culprit of people ”losing” a sensor early, as it is much easier for a shirt sleeve or oddly positioned door frame to get under that loose edge and OUCH – you pop it off.

It is critical that you pay attention to lifting edges of your FreeStyle Libre or Libre 2 sensor over the entire 14-day period.

At this point (usually around day ten), I occasionally need to add a protective barrier over top of my Libre sensor. (Tip 7)

Tip 7: Protect your Libre – give it a helping hand with tape

Let’s admit it, we catch, bang, or shower our Libre sensors daily. Even the best products need TLC to last 14 days and not fall off. Pay attention to your Libre and Libre 2 sensors and in particular, the edges of the adhesive (Step 6) – I firmly believe this is our responsibility as Libre users.

What to do if your Libre sensor starts to come loose or the edges around the sensor start to lift?

I typically go the simple approach and use a small piece of Kinesiology (i.e. KT Tape ) over my sensor. However, there are other products available such as Patchabetes , RockDex, or SimPatch  which are designed to cover the Libre and Libre 2 sensor with a protective bandage.

I have also heard other FreeStyle Libre users have had great success with Tegaderm  which is a transparent waterproof adhesive wound dressing; similar to what you would have over-top of an IV.

For those that choose the kinesiology tape — I recommend rounding off the edges. This will significantly increase the length of time it sticks. Secondly, trim off any loose edges as they start to come loose.

Warning: Be cautious not to pull on your Libre when removing any patch or tape!

My biggest concern with any of these products is that they adhere to both your arm and the sensor. Fortunately, I rarely need to remove the bandage from the sensor as they have lasted the remainder of my 14-day sensor lifespan. For that reason alone I would never put a patch on day one. I find my Libre stick well for the first 7-10 days before the edges start to lift up. I then throw a patch or tape over-top for the last few days to more protect that one little cover where we undoubtedly will get a shirt sleeve or door frame caught underneath.

If you do need to remove the patch or tape before your sensor has expired – I have found that slow and steady wins the race. Be sure not to tug or pull on the sensor.

Hint: Try placing a small piece of gauze between the patch and the Libre or Libre 2 sensor. This should help with reducing the amount of stick to the Libre and assist when changing the patch before your sensor is due to be replaced

No matter what you choose, the key is to help keep the edges of the Libre sensor secure and protected.

Tip 8: Keep the applicator, use it to press the edges of the adhesive back down

Keeping the applicator between new sensors. For starters, I reposition it overtop of the Libre. It does a great job to press down lifting edges of the adhesive. Warning though, do this with caution and care as you do not want to accidentally know the sensor lose.

Have I been successful with these tips? I will let you decide, however, I have been using Freestyle Libre Glucose system for 4 years and have only had an issue with one sensor that accidentally got caught in my shirt as I was taking it off, one Libre that was knocked off wrestling with my son, and a third in a hot tub (although I feel it was coincidence).

Contact Abbott Diabetes Care for a Warranty Replacememnt

Contact your local Abbott Customer Service Centre if your FreeStyle Libre, Libre 14-day, or Libre 2 sensor for any of the following reasons:

  • Your Sensor is routinely off by more than 20% when compared to a blood glucose test. Remember, you need to test your blood and then your Libre with a scan 5 to 10 minutes later to accommodate the lag between interstitial fluids and blood glucose.
  • You are getting errors when trying to read your sensor. If you have a second device, ie a phone, or the Libre Reader. Test both to help determine if it is the sensor or your reader device that is acting up.
  • You knocked off your sensor
  • Your sensor fell off

The FreeStyle Libre representative will discuss and let you know what replacement options, if any, are available to you.

Here are the local contact numbers for Libre Customer Service / Support:

  • Canada: 1-888-205-8296
  • USA: 1-855-632-8658 (available 7 days a week 8 AM to 8 PM Eastern Time; excluding Holidays)
  • United Kingdom: 0800 170 1177 (Monday to Friday between 8:00 AM and 8:00 PM, Saturday 9:00 AM to 5:00 PM (excluding Bank Holidays) or ONLINE (Click here)

Other FreeStyle Libre Resources

This is just one set of helpful tips from one Libre user to another. Be sure to check out a few resources that may be helpful to you and your body type. Here are a few places to start:

  • Accessories, Cases, Patches and More for the FreeStyle Libre – A list of helpful accessories for your FreeStyle Libre and Libre 2 scanner and sensor. Patches, cases, stickers and adhesive patches and guides to help your Libre last the 14 days in style.
  • Abbott FreeStyle Libre Sensor Adhesion Guide – a few very general tips from Abbott themselves to help keep the Freestyle Libre lasting the 10 to 14 days
  • Freestyle Libre | Official Learning videos and Tips – Abbott, the makers of the Freestyle Libre diabetes glucose monitoring system, has released a series of education and learning videos to help us get the most out of our continuous glucose monitoring system (CGM).

Closing Remarks

These steps may not work for everyone as our skin is different. However, as I opened – using these seven tricks, I have never lost a Libre sensor. The one and only sensors I hav lost were to human error as I skipped step 6 as I knew or didn’t check if my sensor edge was pulling loose.

Send me your Freestyle Libre hints and tips!

I would love to hear any other hints or tricks from people. If you are a marketer, please do not provide comments, however, feel free to drop me a message on our contact page.

For convenience, I have these items and a few other options listed in our Amazon Store and our accessories for the freestyle Libre page – free two-day delivery, movies, books, music, and more with Amazon Prime.

Cases, Stickers, and Accessories for the FreeStyle Libre

Here is a list of helpful cases, stickers, patches and accessories for your FreeStyle Libre scanner and sensor. As a Canadian diabetic, I am well acquainted with being prepared. From glucose tablets for hypoglycemic events to alcohol wipes, as just some of my diabetic supplies.

Many of the items on my list, I have personally found extremely useful for my insulin-dependent Type 2 diabetes (aka Type 1 like) treatment of my diabetes and living day to day with my FreeStyle Libre, and a few others have been added to the mix to give everyone a few options to help get the most out of their Libre Sensors and managing their diabetes. For more information on the FreeStyle Libre check out this page. If you are looking for accessories for the Dexcom G5 and Dexcom G6 – check out our page here.

Note: These items are listed in my Amazon Retail Store. Most are also available through your local pharmacy. Click on the image to see the Amazon Listing. Amazon pays a small commission for items purchased through my store.

Search Our Online Amazon Store

Use the search box below to search for the millions of items available through Amazon. Or check out our sections below on Running, Diabetes, and More.

How to Keep Your FreeStyle Libre Safely attached to your arm

The biggest concern people raise about the Freestyle Libre is it falling off before the 14-day lifespan. Here are a few items that help keep your FreeStyle Libre affixed to your arm and help it last / survive the two weeks of its short life. We are all well aware of the perils of door frames and our little Libre. Use these patches to help keep your Libre sticking to your arm for 14 days.

Bestseller No. 1
Ceeport 30 Pack Freestyle Adhesive Patches, Sensor Covers Intended for Freestyle Libre 2/3-Enlite-Medtronic Guardian, CGM Sensor Patches, No Glue in The Center, Long Fixation for Your Sensor(Tan)
  • 【Waterproof and Sweatproof】Our cgm patches are made of high quality natural cotton material, which is waterproof and sweatproof medical grade adhesive. The cotton material dries quickly and...
  • 【Long Lasting】Our diabetic patches hold your sensor device firmly to the skin without causing it to fall off or hang loose, extending lifespan of the sensor. You can enjoy your favorite activities...
  • 【Comfortable and Hypoallergenic】The freestyle adhesive patch is hypoallergenic, latex-free, less irritating to the skin, and will not leave residue on body parts. The cgm covers are elastic to...
SaleBestseller No. 2
Sensor Covers for Libre 3, Waterproof-50 Pack Overpatch for Lbre 3 Plus,Transparent CGM Adhesive Patches Lasting to 14 Days-Without Hole-HECHUAN
  • ❄ Waterproof - HECHUAN waterproof sensor covers for libre 3/plus is much smaller and suitable than the normal one to help you feel free in swimming,shower and any other water activities.
  • ❄ No glue on the center - The adhesive patch specially designed with no hole and no glue on the center,if you need change the patch it will not tear your sensor off.
  • ❄ Long lasting - Comfortable and durable materials make the overpatch last 14 days and do not effect sensor’s date reading.
Bestseller No. 3
Fixic Freestyle Adhesive Patch 25 PCS – Good for Libre 1, 2, 3 & Plus – Enlite – Guardian – NO Glue in The Center of The Patch – Pre-Cut Back Paper – Long Fixation for Your Sensor! (Tan)
  • ✌️ DO YOU WANT TO FASTEN THE SENSOR ON YOUR SKIN SECURELY? DO YOU WANT TO FEEL FREE IN YOUR ACTIVITIES? Our New Adhesive Patches by Fixic Will Keep The Sensor FOR Over Two Weeks! It Has Been...
  • ✌️ FORGET ABOUT PROBLEMS WITH STICKING THE PATCH TO THE SKIN – The Back Paper Of Fixic Adhesive Patch Consists Of Three Parts – PEEL IT OFF EASILY. THEY ARE PERFECT FOR ENLITE, GUARDIAN, LIBRE...
  • ✌️ FIXIC ADHESIVE PATCHES ARE SAFE FOR YOUR HEALTH – LATEX-FREE, HYPOALLERGENIC. Stretchable and Flexible Material Lets Your Skin Breathe Easily.
Bestseller No. 4
Sensor Covers for Libre 3 Waterproof - 20pcs Adhesive Patches for Libre 3,with Easy-Peel Tab Pre-Cut Backing,CGM Sensor Tape for 10-14 Days SereneGlow
  • Secure Attachment: Keep your Libre 3 senor securely attached to your skin with Jinyu-Sega Sports Adhesive Patches. These patches will ensure that your CGM stays put for the full 14-day lifespan. Each...
  • Easy-Peel Backing: Designed with an easy-peel backing label for quick and convenient removal, allowing users to effortlessly apply the adhesive covers without any fuss, even one person can easily...
  • Like second Skin:Jinyu-sega CGM adhesive patches made from Nano 360° Elastic Fabric , staying smooth and stable even with long-term wear. Its exceptional elasticity ensures you won't feel...
Bestseller No. 5
Not Just A Patch Air Libre 3 Plus Sensor Covers (20 Pack) - Thin, Strong and Light Adhesive Patches with Ultra-Hold 15+ Day Adhesion, Durable Freestyle Libre 3 Sensor Covers - Beige
  • Freestyle Libre 3 Sensor Covers - Made especially for the Libre 3, these breathable and water resistant, Not Just A Patch ‘Air’ adhesive patches keep your Freestyle Libre 3 in place without moving...
  • Thinner and Lighter - 'Air' is our thinnest and lightest patch yet. Made from non-woven micropore, Air is stretchier, thinner, and more durable than rival cotton over-patches. Ultra-light and easy to...
  • Longer-Lasting Hold - Careful application of the patch on dry, clean skin will result in 10-14 days of adhesion, however, adhesion duration will be less if skin is subjected to excessive moisture. Air...

As great as pre-cut Freestyle Libre Patches are, my go to option for keeping my Freestyle Libre on and surviving the 14-day life is basic kinesiology tape like RockTape of KT Tape. The tape is designed to last 7 to 14 days, waterproof, and breathable. Here are a few options.

SaleBestseller No. 1
KT Tape, Original Cotton, Elastic Kinesiology Athletic Tape, 20 Count, 10” Precut Strips, Black
  • Easy and versatile application: Easily self-apply KT Tape for back, knee and shoulder pain, plantar fasciitis, tennis elbow and much more; Cut strips into smaller widths or lengths when you need a...
Bestseller No. 2
CKeep Uncut Kinesiology Tape(2 Rolls), Original Cotton Elastic Premium Athletic Tape,Latex Free Hypoallergenic, 2inch x 16ft, Beige
  • WHAT IS CKeep TAPE? - Elastic sports tape made with 96% original cotton and 4% spandex yarn: latex-free, hypoallergenic, and breathable!
  • HOW DOES IT HELP YOU? - The kinesiology tape helps relieve stress and pain in joints and muscles, improves blood and lymphatic circulation, increase your athletic performance.
  • WHY CHOOSE CKeep? - Trusted by professionals, highly elastic and waterproof, skin-friendly and glue-free, perfect for athletes sports training, physical therapy and more.
Bestseller No. 3
5 Rolls Kinesiology Tape, 5 Colors 2 inch x 16.4 Feet Waterproof Athletic Tape, Uncut Kinetic Tape, Elastic Muscle Tape, Sports Tape, Knee Tape for Exercise and Daily Use
  • 【5 Rolls Kinesiology Tape】Package includes 5 rolls of kinesiology tape and a pair of scissors. Each kinetic tape is 2 inch wide and 16.4 feet long, They all made of cotton, strong hypoallergenic...
  • 【Muscle Support】Our kinesiology tape can provide support to muscles, It can Provide targeted support during physical activity to enhance muscle awareness and movement stability
  • 【Waterproof Kinetic Tape】We have upgraded the cotton material and adhesive of the kinetic tape, and adopted a unique water ripple design to make our muscle tape water resistant and sweat...

More Freestyle Libre Patches

Find more Freestyle Libre protective patches in our Online Store – Search Here

Protective Cases for your FreeStyle Libre Scanner

Looking for a case to protect or carry around your FreeStyle Libre Scanner. Here area few options for you to choose from. Search Here for more case options.


RockaDex Freestyle Libre Protective Case

  • 7 great colors to choose from
  • Keep your Libre meter safe while in a handbag, school bag or briefcase
  • Extensive range of Silicone Cases and Stickers gives you the chance to not only offer some protection to your Libre, but give it some life to your diabetic tools.
  • The Freestyle Libre Silicone Cases also fit the Insulinx Meter.


Abbott Freestyle Libre Case

  • Easy to Install Case
  • Cases are Made of Hard, but Slightly Bendable Plastic
  • Available in multiple colours – black, blue, and pink


Pouch case with Rotating Belt Clip For Freestyle Libre CGM

  • 4 great colours for your FreeStyle Libre Scanner Case to choose from
  • High-Quality Nylon canvas Pouch,- Classic and professional look
  • Velcro closure with soft inside cushioning.
  • Rotating Belt clip, use to clip on or slip through a belt
  • Provides excellent protection from the elements, scratches, dirt, and shocks.
  • Designed for Freestyle Libre (Canada / US Model)


Premium Pouch case with Belt Clip For Freestyle Libre CGM (Horizontal)

  • High-Quality Nylon canvas Pouch,
  • Classic and professional look
  • Velcro closure with soft inside cushioning.
  • 2 way Belt clip, use to clip on or slip through a belt
  • Provides excellent protection from the elements, scratches, dirt, and shocks.
  • Design for Freestyle libre

More Freestyle Libre Cases

Search for more Freestyle Libre carrying cases and designs here – Search Now

Glucose Management and Hypoglycemic Recovery

Here are some recommended tools to help deal with our hypoglycemia. Hypoglycemia is a condition caused by a very low level of blood sugar (glucose).

Hypoglycemia, also known as low blood sugar, is when blood sugar decreases to below 4 mmol/L.  Dex 4 glucose tablets are my first choice when managing a hypoglycemia episode and gives me a precise amount of glucose.

My Treatment: I take 4 DEX 4 tablets; wait 15 minutes and then retest.


Bestseller No. 1
TRUEplus® Glucose Tablets, Orange - 50ct
  • Contains 15 grams of Fast-Acting Carbohydrates per Serving
  • 4 tablets per serving
  • Fat Free, Gluten Free, Sodium Free
Bestseller No. 3
TRUEplus Glucose Tablets, Orange Flavor - 6X 10ct Tubes
  • Contains 15 grams of Fast-Acting Carbohydrates per Serving
  • 4 tablets per serving
  • Fat Free, Gluten Free, Sodium Free
SaleBestseller No. 4
Relion Glucose Tabets: Orange, Tropical and Fruit Punch Total 30 Tablets
  • Orange, Tropical and Fruit Punch
  • 10 tablets each tube of Relion Glucose Tablets
Bestseller No. 5
Dex4 Glucose Tablets, Fast Acting Glucose, 4g Pre-Measured Glucose per Tablet, Fat-Free, Gluten-Free, Grape, 50 Count Bottle
  • Convenient Anywhere, Anytime: Easy-to-chew glucose tablets, perfect for on-the-go use whenever you need it.
  • Pre-Measured Precision: Each tablet is pre-measured with 4 grams of glucose, ensuring accurate carb intake without the need for measuring. Dex4 is specially formulated with d-glucose which works...
  • Specially Formulated: Fat-free, gluten-free, caffeine-free, and sodium-free—suitable for a variety of dietary needs.
Bestseller No. 7
YUM-V'S Glucose Gummies – Fast Acting Glucose Gummy – Great Tasting – Gluten Free, Vegan, Non-GMO – Orange & Berry Natural Flavor – 60 Chewable Gummies for Adults & Kids
  • QUICK ENERGY FROM CARBOHYDRATES - Each serving provides 4g of carbohydrates and 1g of glucose, offering a fast source of energy when needed during daily activities.
  • TASTY FRUIT FLAVORS - Enjoy the natural orange and berry taste in these soft, easy-to-chew gummies. Formulated to be enjoyable for both kids and adults.
  • VEGAN-FRIENDLY FORMULA - Free from animal products, gelatin, gluten, peanuts, and tree nuts. Made with ingredients derived from natural sources and free from artificial dyes.
Bestseller No. 9
Stelo Glucose Biosensor & App by Dexcom - A Leader in Continuous Glucose Monitoring (CGM). 24/7 Tracking & Personalized Insights to Reveal Patterns. 2-Pack (Up to 15 Days Each). iOS & Android.
  • ✅ For people NOT using insulin, ages 18 years and older
  • ❌ Don’t use if: On insulin, on dialysis, or have problematic hypoglycemia
  • YOUR SUCCESS, OUR COMMITMENT: If your biosensor fails before the 15-day wear time is up,[2] we will replace it for free. [3]

Emergency Contact Information – Medical Alert on Steroids

Road ID – My RoadID is my comfort blanket against the what if. Never had to use it however, good to know that my chronic illnesses, contract information, and who I am is easily accessible to anyone that may need it. RoadId comes in a variety of styles from bracelets, necklace, and as a band attachment of FitBit, Garmin, and Apple watches and smart devices.

RoadID - performance emergency identification. ROAD iD speaks for people when they can't speak for themselves. Check out one of the stories that speaks for ROAD iD, and shows why wearing ID is so important.

Much like carrying my insulin, plenty of water while out for a run or my helmet riding – I would never go for a run or a ride without Road ID; even just a quick 5KM around the block. Honestly, I wear it 24/7/365.

Diabetes Books and Education

SaleBestseller No. 1
Managing Type 2 Diabetes For Dummies
  • American Diabetes Association (Author)
  • English (Publication Language)
  • 336 Pages - 02/13/2018 (Publication Date) - For Dummies (Publisher)
SaleBestseller No. 2
The Diabetes Code: Prevent and Reverse Type 2 Diabetes Naturally (The Diabetes Code, 1)
  • Fung, Dr. Jason (Author)
  • English (Publication Language)
  • 288 Pages - 04/03/2018 (Publication Date) - Greystone Books (Publisher)
SaleBestseller No. 3
Glucose Revolution: The Life-Changing Power of Balancing Your Blood Sugar
  • Hardcover Book
  • Inchauspe, Jessie (Author)
  • English (Publication Language)
SaleBestseller No. 4
Mastering Diabetes: The Revolutionary Method to Reverse Insulin Resistance Permanently in Type 1, Type 1.5, Type 2, Prediabetes, and Gestational Diabetes
  • Khambatta PhD, Cyrus (Author)
  • English (Publication Language)
  • 400 Pages - 10/18/2022 (Publication Date) - Avery (Publisher)
Bestseller No. 5
Choose Your Foods: Food Lists for Diabetes
  • Academy of Nutrition and Dietetics (Author)
  • English (Publication Language)
  • 65 Pages - 06/01/2019 (Publication Date) - Academy of Nutrition and Dietetics (Publisher)
SaleBestseller No. 6
Diabetes Head to Toe: Everything You Need to Know about Diagnosis, Treatment, and Living with Diabetes (A Johns Hopkins Press Health Book)
  • Kalyani, Rita R. (Author)
  • English (Publication Language)
  • 344 Pages - 12/18/2018 (Publication Date) - Johns Hopkins University Press (Publisher)
SaleBestseller No. 7
The Diabetic Cookbook and Meal Plan for the Newly Diagnosed: A 4-Week Introductory Guide to Manage Type 2 Diabetes
  • Zanini RD CDE, Lori (Author)
  • English (Publication Language)
  • 272 Pages - 06/12/2018 (Publication Date) - Callisto (Publisher)
SaleBestseller No. 8
Dr. Neal Barnard's Program for Reversing Diabetes: The Scientifically Proven System for Reversing Diabetes Without Drugs
  • Barnard, Neal (Author)
  • English (Publication Language)
  • 288 Pages - 02/27/2018 (Publication Date) - Rodale Books (Publisher)
Bestseller No. 9
The Diabetic Food Bible - The Complete Low-GI Nutrition Guide: What You Really Need to Know to Balance Blood Sugar, Manage Prediabetes and Type 2 Diabetes, Keeping the Food you Love
  • Clark, Adam J. (Author)
  • English (Publication Language)
  • 158 Pages - 05/13/2024 (Publication Date) - Carewell Press (Publisher)
Bestseller No. 10
HAMIEW 3 Count Diabetes Food List and Meal Planner Laminated, Diabetic Food List Chart for Type 1 2 Diabetes, Healthy Diabetic Diet Meal Guide Plan Recipes Cookbook For Beginners Pre-Diabetes, Glycemic Index Chart
  • 🍽️ COMPREHENSIVE NUTRITIONAL BREAKDOWN: Our type 2 diabetes food chart brochures provide a thorough nutritional analysis of a wide range of foods, including snacks, beverages, and meal plans,...
  • 🍽️ EASY-TO-FOLLOW FOOD CATEGORIES: Each brochure categorizes foods into "Foods to Eat" and "Foods to Avoid", making it simple to plan meals and maintain a balanced diet. Ideal for those managing...
  • 🍽️ VISUAL AND INFORMATIVE DESIGN: Featuring colorful illustrations and clear, concise information, these brochures provide quick access to a type 2 diabetes food list and a glycemic index chart,...

Other Recommended books and education on diabetes

In addition to Amazons top 10 books on diabetes. Here are a few other great reads for you to consider.

Decorative Stickers, and Other Items for your FreeStyle Libre

Looking to make your FreeStyle Libre more stylish. Let’s all agree – white is a bit, well White. Here are a few links to help you pimp up your sensor and scanner. Word of caution – I can not speak to if the stickers reduce how well we can scan the sensors – my other curiosity is if the sensor itself can still disperse heat. However, those that love the stickers swear by them.

Your input is important!

I would love to hear from you. What has worked well, what has not? Send me s message and some link suggestions and I will be sure to add them to the list. ->> Contact me here!

If you have anything you want me to test; I will be sure to give it a thorough testing. After all — we all live with our diabetes 24/7 – great products make for one less thing for users to worry about.

Repost: How Running Helped Mark Hanlon Take Control of Injury and Illness

As many of you know, I am a strong believer that despite our challenges, whether it is a chronic illness, injury, or simply time, we are in control of our bodies both physically and more importantly mentally. Our biggest success is defining who we are and not letting chronic illness or injury dictate who we are or what we can accomplish.

Canadian Running recently posted a little article about me, my running, and my challenges overcoming chronic illness (Crohn’s and Diabetes), and injury (broken tibia and fibula).

Be sure to give it a read, did a fantastic job at capturing my running story. Read my Canadian Running article here.

Mark Hanlon is the winner of our Under Armour Eastside 10K contest, get to know him and his running story

Source: How running helped Mark Hanlon take control of injury and illness – Canadian Running Magazine

Tip: How to view webpage HTML on iPad / iPhone

This article outlines the steps required to view the source code (HTML, CSS, JavaScript, etc.) for any webpage on your iDevices including iPad, iPhone or iPod touch using iOS 15 without any hacks or javascript.

How to View HTML source code on iOS Devices like iPhone and iPad

  1. Install a free ios app called View Source
  2. Open Safari and visit a webpage you would like to view the HTML code
  3. Click the Share Button
  4. Navidate down to Actions
  5. Choose View Source

As a web design project manager, I need to view HTML from my iPhone or iPad. Here are a few quick steps to set up your iPhone to view HTML source code. These steps do not require any JAVA hacks, helping a HTML developer take a look at the HTML source code for any website. Check out these steps.

Note, these steps may work on older versions of iOS, however, have not been tested. This process uses a small app without the need for backdoor programming, javascript, or other coding is required! For iOS 12 and lower, scroll down. 

Here are detailed steps that I have been using to view HTML source code without and JAVA hacks.

How to view HTML source code on iPhone / iPad iOS Devices

Step 1: Install a free app from the Apple Store called View Source.

Step 2: Load Safari (iPhone, iPod, or iPad), if it is not already open, and visit any web page.

Step 3: Click the Share Button (it looks like a box with an arrow pointing upwards.)

Step 4. Scroll down to your Actions (below Messenger favourites and app icons)

Step 4: Scroll down to actions (Steps to view HTML in IOS 13)
Step 4: Scroll down to actions (Steps to view HTML in IOS 15)

Step 5. Choose View Source (see Step 5 and 6 if View Source is not listed)

Step 5: Choose View Source to see HTML any time in iOS 13
Step 5: Choose View Source to see HTML any time in iOS 15

Step 6. If View Source is not available – choose edit actions at the bottom of the screen and enable View Source

Step 5: Enable: View Source if missing
Step 6: Enable: View Source if missing

Step 7. To move View Source to the top of the list (favourite Actions) – select edit actions on the bottom of the page.

Step 7: Choose View Source any time to view the page HTML in iOS 13.

That’s it! Now you can use the new “View Source Button” under your Share Button to review the HTML on any webpage using mobile Safari (and Chrome) on your iDevice (iPhone, iPod, or iPad).

Tremendous kudos to Roman Tomjak and his simple View Source app and clean integration into the safari web environment.

Repost: Questions You Should Never Ask a Trail Runner

Trail Running is certainly an odd blend of community and introspection.  We are there when you misstep one of the three r’s (root, rock, rutt) and need a helping hand up and at the same time, we appreciate the silence of the woods as we zip and zag through a single track.

The great writers at Canadian Trail Running Magazine have pulled together this incredible list of 13 questions you should never ask a trail runner. As you read through them I am sure you will be smiling and bobbing your head in as much agreement as I was.

Here were a few of my favourites:

  1. It took you two hours to run 4K? I thought you were fast?
  2. Did you know you could take the gondola up to the top of the mountain?
  3. Where do you go the bathroom?

For a read of all 13 questions you should never ask a trail runner, be sure to check out the full article here.


This article was originally posted at: https://runningmagazine.ca/trail-running/questions-you-should-never-ask-a-trail-runner/

Trail Running 101 : Tips for Beginners and Advanced Trail Runners

0

I recently had the opportunity to participate in a Trail Running 101 clinic put on by the great team at 5-Peaks Ontario. Here are a few trail running tips for beginners that I pulled away from the trail running clinic.

Definition of Trail Running: Hiking + Running + Nature = TRAIL RUNNING

Before I jump into my Trail Running 101 Tips for beginners – for those that are not familiar with the 5-Peak Series of trail races let me give you a quick rundown.

Click here to jump right to the Trail Running Tips and Tricks for Beginners.

5-Peaks Trail Running?  What is that?

5-Peaks Logo - Offering trail running races across Canada.

“Spend some time in nature with us. 5 Peaks events are more than just trail races, they are special celebrations of nature, of the hard work we put into our training of strength, and of family and community.” 

5-Peak delivers trail races across Canada, hosted at some of the most spectacular natural spaces in the country.  Each race takes place on pre-marked natural surface trails with participants running over rocks, roots, tree stumps and logs, through mud puddles, snow and much more.  The running series goes from May to October, hosting one race per month.

5-Peaks Trail Race series consists of:

  • a free Children’s Challenge (50m – 1km),
  • a Kidspeaks Timed Kids Challenge (about 3k),
  • a Sport Course (5-8 km) entry-level course, and
  • an Enduro Course (10-15 km) intermediate to advanced course.
  • Certain races will also have a half marathon distance.

Races ate held across Canada and include:

  • Alberta (North and South)
  • British Columbia
  • Ontario
  • Quebec

Trail Running 101 – What are the Top Tips and Tricks?

Here are a few hints, tips and tips I took away from my morning at a trail running 101 clinics for beginners that was offered by the great 5-Peaks trail crew. A special shout out to Arc’Teryx who sponsored the event and warmed us up with post-run coffee and a goodie bag. I am in love with their Gore-Tex Norvan Jacket – time to start saving.

Tip 1) Look Ahead, not Down!

Picture of me: Dressed for a spring trail run.
Out enjoying a little trail run (April 2019)

Trail running is a balance between the wows of vistas, the excitement of what is around the next bend, and watching out for the next rock, root, rutt, twig, or hole.

It is amazing what your eyes and memory can take in – believe me, trust your brain! Look ahead about 20 meters, not down – your memory and reflexes will take care of the rest.

Don’t get me wrong, when you are approaching a technical piece where every foot plant is critical – take each step at your own pace. However, 9/10 times what gets you in trouble is not what is right under your feet but what you missed 10 steps ahead by not looking up as that branch attempts to close line you and succeeds in drawing blood, or that small innocent enough rock just sticking out of the sand that your toe, kicks and you stumble.

While trail racing, and particularly on a single track (A single-track trail is one where users must generally travel in a single file), we are continuously tempted to bunch up — however, all we are really doing is creating a wall and missing what is ahead.  Just think how much it drives you crazy being stuck behind a transport truck on the highway – not being able to see what is coming. IT IS THE SAME THING!

If you are really eager to move a bit faster — simply yell the customary “on the left” as you gently move past the crowd or better yet; just drop back a few paces and give everyone some breathing room.  After all – very few of us are podium bound so sit back, enjoy the run, make a new friend, take in the sights, the smells, and each twist and turn on the trail.

Tip 2) There is no shame in walking up the hills

A nice little hill climb to start off  5-Peaks Ontario Kelso Trail Run. At the top of the Niagara Escarpment gives yous some great scenic views.
A nice little hill climb to start off Kelso Trail Run.

My first trail race of the season was at a downhill ski resort (Kelso Conservation Area) – before you get all “OH WOW”, remember this is Ontario so we are not talking crazy B.C. or Alberta trail running.

A 1 KM climb is certainly a way to wake up the legs for the rest of your run. Now try to picture what is better — a brisk hike up the steeper grades and maintaining your heart rate or even better a bit of a recovery or pushing yourself and your heart rate to zone 5.  Who do you think is going to be able to maintain a better pace once you make it to the “flats” at the top of the hill? 

Trail running is a balance between running when the environment gives you a nice twist and turn through the woods, letting your legs guide you down the declines, and balancing the uphill’s between letting your momentum take you up the first bit of an incline and steady hiking to the crest.

Like our hill training on the road – as we progress through the season, those hills will get easier – however, as I suggested at the beginning – why try to run the hills, when you can power hike just as quick and make up the time over the next few hundred meters?

Tip 3) Leave your Headphones at Home

Why are you trail running in the first place?  To get away from the hustle and the bustle of running in the city, to enjoy nature, the sound of our feet on the path as we crunch over twigs, and if we are lucky a few encounters with nature.  How can you hear the leaves rustling if we have headphones in?  You are missing out on the best part of trail running.

Image: A nice dusting of snow through and early season trail run.
Yes – snow the end of April (2019). However, was great, just me, the trail and the falling snow.

If nature isn’t a good enough reason to leave your earphones at home during trail running you will encounter a combination of double and single track trails. A quick-moving trail runner, especially one who seemingly emerges from out of nowhere on an unsuspecting trail user, can be quite alarming. Give a courteous and audible announcement well in advance of your presence and intention to pass hikers or other runners on the trail stating something like, “On your left,” or “Trail” as you approach the trail users. This is equally as important during a trail race when you are in a pack of a few hundred runners spread across a race route. These announcements do not work work well for those who are wearing headphones and blasting music.

As trail runners – let’s set the standard; leave the headphones at home.  If you are really stuck with wanting to have your music on the trails – check out bone conduction headphones like AfterShokz Trekz Air; allowing you to retain full awareness of ambient sounds and hear your music too. I wish I had a pair (just not for the trails) — they are on the bucket list along with my Arc’Teryx Norvax Jacket.

Tip 4) No Special Equipment is Required to Begin Trail Running

I joke that running is the “most expensive free sport” – at the same time, it doesn’t need to be.  Start a road or trail running with your sneakers; a pair of shorts and a t-shirt.  Most of the trails are well worn – you will do fine as a trail running beginner.

As your distance / time in the woods progresses – consider a hydration pack of some sort. A water bottle you carry, a hydration belt, or trail vest.  Don’t laugh – I got lost last week on a little trail run.  My 4 to 5 kilometres turned into 10.  In my defence, my “getting lost” is a bit of a jaded definition — I was determined to find a loop back to my starting position over an out and back – I hate out and back.  The trail won, after a couple of false loops, some doubling back to try a different trail, I finally took the same route back as I started.  However, where I was going with the story is you never know how long you will be out – getting lost; injured; just deciding to go a few more KM – my water came in handy after 90 minutes on the trail.

Compare: Trail Shoe (Solomon SpeedTrax) vs Road Running Shoe (Mizuno WaveRider).  A bit different tread pattern.
Trail Shoe (Solomon SpeedTrax) vs Road Running Shoe (Mizuno WaveRider)

Secondly – a pair of trail shoes.  Yes, road shoes and now trail shoes (see the most expensive free sport).  Believe me; you will thank me for four reasons.  The same race I mentioned earlier was after two days of rain – – under the forest canopy life was beautiful, dry, pristine, your road shoes were happy. Then there were the sections close to a pond that had crested its banks or the odd creek.  Mud, mud, glorious mud! 

So why trail shoes?

  • Reason 1 – In addition to a more rugged of a sole to provide great grip (look at my photo of my road vs trail shoes)
  • Reason 2 – Trails shoes are also made from Gore-tex which as we all know = dryer feet, and as an added bonus
  • Reason 3 – Most trail shoes have a reinforced toe to save you from the ouch when you kick a rock or two.  However, if for no other reason –
  • Reason 4 – To save your pretty road shoes from the disaster of mud – LOL (you should see the other side of my trail shoes)

Tip 5) Plan Ahead, Inform a Friend, return home safe

This rule applies to every run, however, even more so for trail runs when the chances of having a car or another person run by the next 10 minutes or an hour is pretty slim.

Plan your route ahead of your run

Know your route; plan it out from a local trail guide, the internet, or your favourite running app.  Remember; add 25 – 50% effort to your distance.  If you usually run a 5K in 30 minutes – expect a trial run to take you 45 minutes. You pace is slower, your footing not a secure, and loads of uphill and downhill.  This is even more important when you are not familiar with the route.

Inform someone of where you are running and when you expect to be back

Better be safe than sorry – if you are running alone, be sure to let someone know where you are running, and what time you are expected back.  Even something as simple as rolling your ankle 5 KM out makes for a long walk back.  There are few short cuts in the forest and UBER is non-existent.

Return home safe

Bring your phone, a GPS, or even your running watch with Map Mode on will all help you arrive home safe.  One word of caution – there are no guarantees you will get great cell reception away from the beaten path, so plan, plan, plan.

More Trail Running 101 Tips for Beginners

Well, that is it for my 101 Trail running tips. I will be sure to add more trail running 101 tips for beginners as this amateur / newbie trail runner gets his feet muddy and learns after every stumble. Check back soon for more helpful tips.

If you have any suggestions, feel free to leave a comment below. In the meantime, check out the 5-Peak races near you. MEC also offers a great race series that are worth checking out.

Trail Running Race Series in Ontario

Ontario 5-Peaks Trail Races

Ontario is an amazing place to trail run. You can find out about the races on the 5 Peaks website at: 5-Peaks Ontario Trail Races.

5 Peaks offers (fancy that) 5 races in the Ontario for the 2020 schedule:

Kelso – May

Not only is Kelso beautiful to visit (you should see how the escarpment changes in each season), but there is also so much to do: camping, picnicking, mountain biking, a ski hill, stand-up paddleboards, swimming, and even movies under the stars! You’re not bereft of choice when you visit Kelso Conservation Area. Beautiful trails with rock gardens and roots to challenge runners, two challenging ski hill climbs, picture-worthy view overlooking the park and GTA, and a beautiful sandy beach to relax on after the run. The race includes parts of the Bruce Trail

Rattlesnake Point – June

The Rattlesnake Point Conservation Area has some of the most inspiring scenic viewing found anywhere. Five breathtaking lookouts dot the edge of towering cliffs of Ontario’s striking Niagara Escarpment. With excellent hiking trails, this natural environment park is perfect for that therapeutic walk (or trail run) in the woods during any season.

Albion Hills – July

Set in the hills of Caledon on the banks of the Humber River, Albion Hills offers dramatic scenery, exciting activities and excellent facilities – only 45 minutes from Toronto!

Heart Lake – September

Heart Lake Conservation Area takes its name from the spring-fed kettle lake, which is roughly shaped like a heart. Located within the Etobicoke Creek watershed, this park is a popular destination for residents of Peel Region, with more than five million visitors since it opened in 1957. The park is also very popular with anglers in the area as it is stocked with hundreds of rainbow trout each year.  

Mansfield – October

Mansfield is located at the Mansfield Outdoor Centre in Mansfield, just south of Alliston on Airport Road. The course will be 6k-7k for the Sport course and 12-14k for the Enduro. Loaded with fast and flowing singletrack, with some doubletrack and lots of climbing for a ton of fun. The course is a combination of roots, rocks, sand but it is 100% enjoyable for all, including first-timers to experienced trail runners.

Other Ontario Trial Races

Check out some of these other great trail races in Ontario.

Mountain Equipment Co-op (MEC)

Has a great trail race series.  You can find their next race.  The schedule for my local MEC store is here.

Race ONEHeritage Park, Barrie5K/10KApril
Race TWOTree Nursery Park, Springwater (Trail)5K/10K/15KMay
Race THREEEarl Rowe Provincial Park, Alliston5K/10K/Half MarathonJun

Hardwood Hills Trail Running Series

Offers 6 races over the summer from May to November with 5 KM and 10 KM courses. Each race will take you through different parts of the Hardwood Hills ski and mountain biking trails. Register for the entire series or for individual races.

Check out the race series here.